


A todo app is a software application designed to help users keep track of their tasks or activities that need to be completed. The app provides a simple interface for users to add new tasks, assign priorities or deadlines, and mark them as completed when done.
A typical todo app usually comprises a list view of all current and completed tasks, with options to sort and filter them based on different parameters such as priority, due date or category. Some apps may also include additional features such as reminders, notes, sub-tasks, collaboration or integration with other tools like calendars, emails or project management software.
Todo apps can be implemented on different platforms such as web, mobile or desktop, and can be designed with different levels of complexity and customization. They can serve different purposes depending on the users' preferences or needs, from personal task management to team collaboration or project planning.
Overall, a good todo app should be user-friendly, reliable, and efficient in helping users manage their daily tasks and improve their productivity.
A Flutter todo app can be designed using the Flutter framework, which allows for building native apps for Android and iOS with a single codebase. Here are some details that could be included in a Flutter todo app:
Features:
A list view of all tasks to be completed, sorted by priority and due date.
Add new tasks with a title, description, due date, and priority level.
Edit existing tasks, mark them as completed, or delete them.
Option to search or filter tasks based on different criteria.
Dark and light mode support.
Architecture:
Implement the Provider package for state management.
Use SQLite as the local database to persist task data.
Use the BLoC (Business Logic Component) pattern to separate the presentation logic and business logic of the app.
Implement the Repository pattern to manage data flow between the data source (database) and the BLoC.
User Interface:
Use Material Design guidelines for styling the app.
Use custom widgets and animations to implement a pleasant user experience.
Display a summary of the number of tasks due today or in the future.
Allow users to swipe to delete or mark a task as completed.
Implement simple transitions and animations to give visual feedback on actions taken.
Overall, a Flutter todo app can be a great showcase of how powerful and versatile the Flutter framework can be. It could also provide a practical example of how to implement best practices in state management, data persistence, and UI design in a mobile app.
A simple Flutter TODO app that you can use as a starting point to build your own version of a TODO app:
import 'package:flutter/material.dart';

void main() => runApp(TodoApp());

class TodoApp extends StatelessWidget {
  @override
  Widget build(BuildContext context) {
    return MaterialApp(
      title: 'Flutter Todo App',
      home: TodoList(),
    );
  }
}

class TodoList extends StatefulWidget {
  @override
  _TodoListState createState() => _TodoListState();
}

class _TodoListState extends State<TodoList> {
  List<String> _todoItems = [];

  void _addTodoItem(String task) {
    if (task.length > 0) {
      setState(() => _todoItems.add(task));
    }
  }

  void _removeTodoItem(int index) {
    setState(() => _todoItems.removeAt(index));
  }

  Widget _buildTodoList() {
    return ListView.builder(
      itemBuilder: (BuildContext context, int index) {
        if (index < _todoItems.length) {
          return _buildTodoItem(_todoItems[index], index);
        }
      },
    );
  }

  Widget _buildTodoItem(String todoText, int index) {
    return ListTile(
      title: Text(todoText),
      onTap: () => _removeTodoItem(index),
    );
  }

  void _pushAddTodoScreen() {
    Navigator.of(context).push(
      MaterialPageRoute(
        builder: (BuildContext context) {
          return Scaffold(
            appBar: AppBar(
              title: Text('Add a task'),
            ),
            body: TextField(
              autofocus: true,
              onSubmitted: (val) {
                _addTodoItem(val);
                Navigator.pop(context);
              },
              decoration: InputDecoration(
                hintText: 'Enter something to do...',
                contentPadding: const EdgeInsets.all(16.0),
              ),
            ),
          );
        },
      ),
    );
  }

  @override
  Widget build(BuildContext context) {
    return Scaffold(
      appBar: AppBar(
        title: Text('Todo List'),
      ),
      body: _buildTodoList(),
      floatingActionButton: FloatingActionButton(
        onPressed: _pushAddTodoScreen,
        tooltip: 'Add task',
        child: Icon(Icons.add),
      ),
    );
  }
}
This app includes a list view of tasks, a form to add new tasks, and the ability to remove tasks when they are completed.
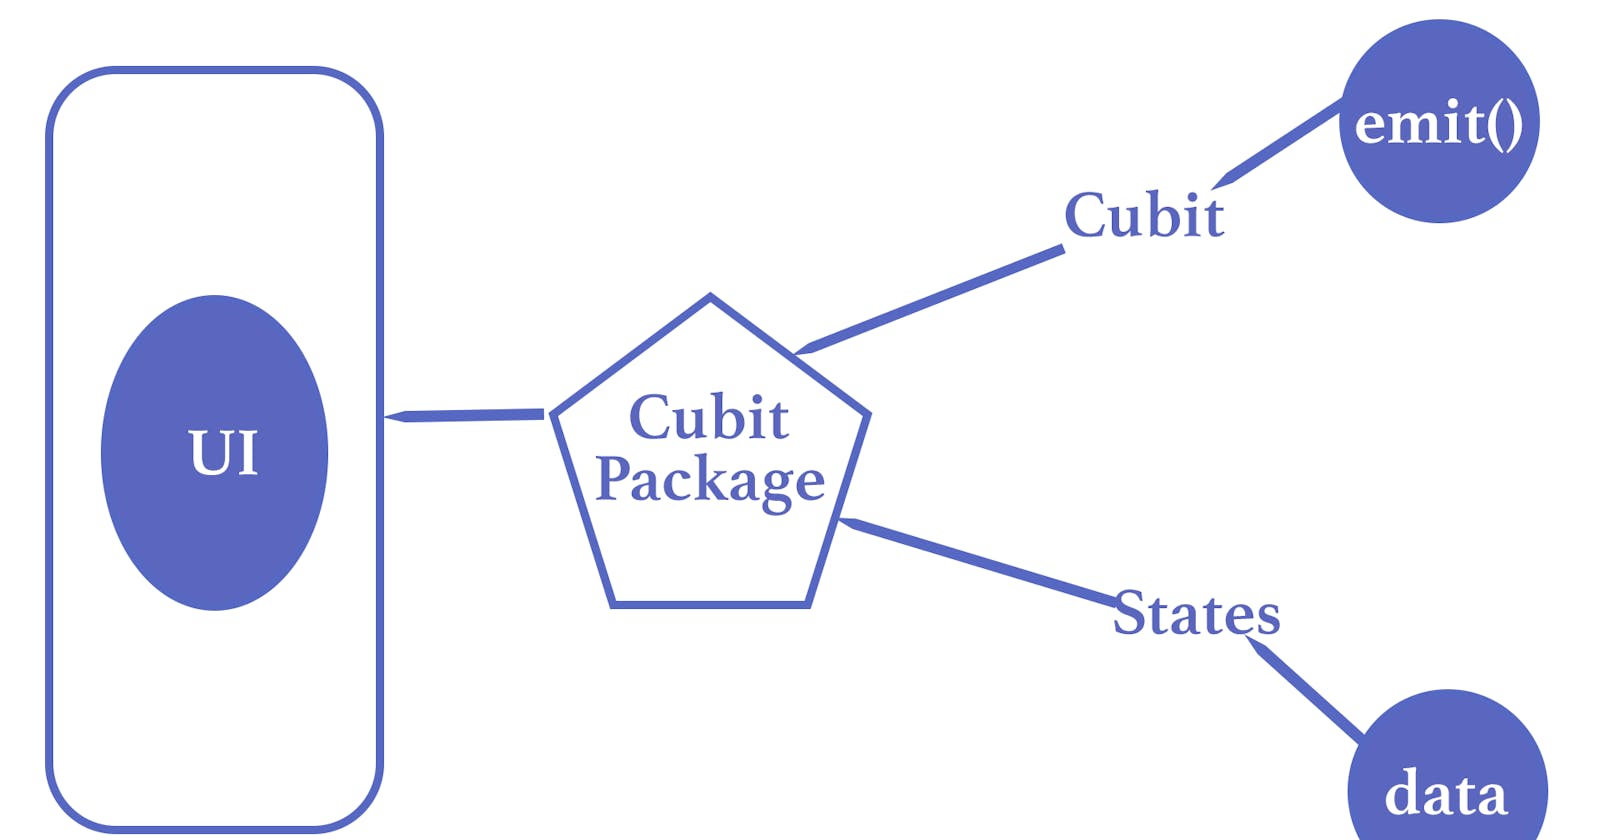
One popular Flutter state management solution that has been gaining a lot of attention recently is Cubit. Using the Cubit architecture pattern can help to structure your application and make it more testable and modular. In this tutorial, we'll be walking through the process of building a modified version of a classic Todo app using Cubit. We will showcase how easy it is to manage state in Flutter using Cubit and how effective it can be in creating high-quality and stable applications. So, let's dive in and learn all about implementing Cubit in your Flutter app!
Here is the modified version of the TODO app to use Cubit:
import 'package:flutter/material.dart';
import 'package:flutter_bloc/flutter_bloc.dart';

void main() => runApp(TodoApp());

class TodoApp extends StatelessWidget {
  @override
  Widget build(BuildContext context) {
    return MaterialApp(
      title: 'Flutter Todo App',
      home: BlocProvider<TodoCubit>(
        create: (_) {
          return TodoCubit();
        },
        child: TodoList(),
      ),
    );
  }
}

class TodoCubit extends Cubit<List<String>> {
  TodoCubit() : super([]);

  void addTodoItem(String task) {
    if (task.length > 0) {
      state.add(task);
      emit(List.from(state));
    }
  }

  void removeTodoItem(int index) {
    state.removeAt(index);
    emit(List.from(state));
  }
}

class TodoList extends StatelessWidget {
  @override
  Widget build(BuildContext context) {
    return Scaffold(
      appBar: AppBar(
        title: Text('Todo List'),
      ),
      body: BlocBuilder<TodoCubit, List<String>>(
        builder: (context, state) {
          return ListView.builder(
            itemCount: state.length,
            itemBuilder: (context, index) {
              final todoText = state[index];
              return ListTile(
                title: Text(todoText),
                onTap: () =>
                    context.read<TodoCubit>().removeTodoItem(index),
              );
            },
          );
        },
      ),
      floatingActionButton: FloatingActionButton(
        onPressed: () async {
          final task = await Navigator.of(context).push(
            MaterialPageRoute(
              builder: (BuildContext context) {
                return AddTodoScreen();
              },
            ),
          );
          if (task != null) {
            context.read<TodoCubit>().addTodoItem(task);
          }
        },
        tooltip: 'Add task',
        child: Icon(Icons.add),
      ),
    );
  }
}

class AddTodoScreen extends StatelessWidget {
  final _formKey = GlobalKey<FormState>();

  @override
  Widget build(BuildContext context) {
    String task = "";
    return Scaffold(
      appBar: AppBar(
        title: Text('Add a task'),
      ),
      body: Form(
        key: _formKey,
        child: Column(
          children: [
            TextFormField(
              autofocus: true,
              onChanged: (value) {
                task = value;
              },
              validator: (value) {
                if (value == null || value.isEmpty) {
                  return 'Please enter a task';
                }
                return null;
              },
              decoration: InputDecoration(
                hintText: 'Enter something to do...',
                contentPadding: const EdgeInsets.all(16.0),
              ),
            ),
            SizedBox(
              height: 16,
            ),
            ElevatedButton(
              onPressed: () {
                if (_formKey.currentState!.validate()) {
                  Navigator.of(context).pop(task);
                }
              },
              child: Text('Add'),
            ),
          ],
        ),
      ),
    );
  }
}
This modified app still has the same functionality as the previous one. However, now it uses Cubit to handle state management. We have a TodoCubit class that extends Cubit and emits a new state when we add or remove a todo item. We also use BlocBuilder to listen to changes of the state in our UI. Finally, we use the context.read<T>() method to access the instance of TodoCubit declared in the provider and to add or remove todo items.